Miseria Stats Explained
What each core attribute does—and how to spend points without wasting a run.
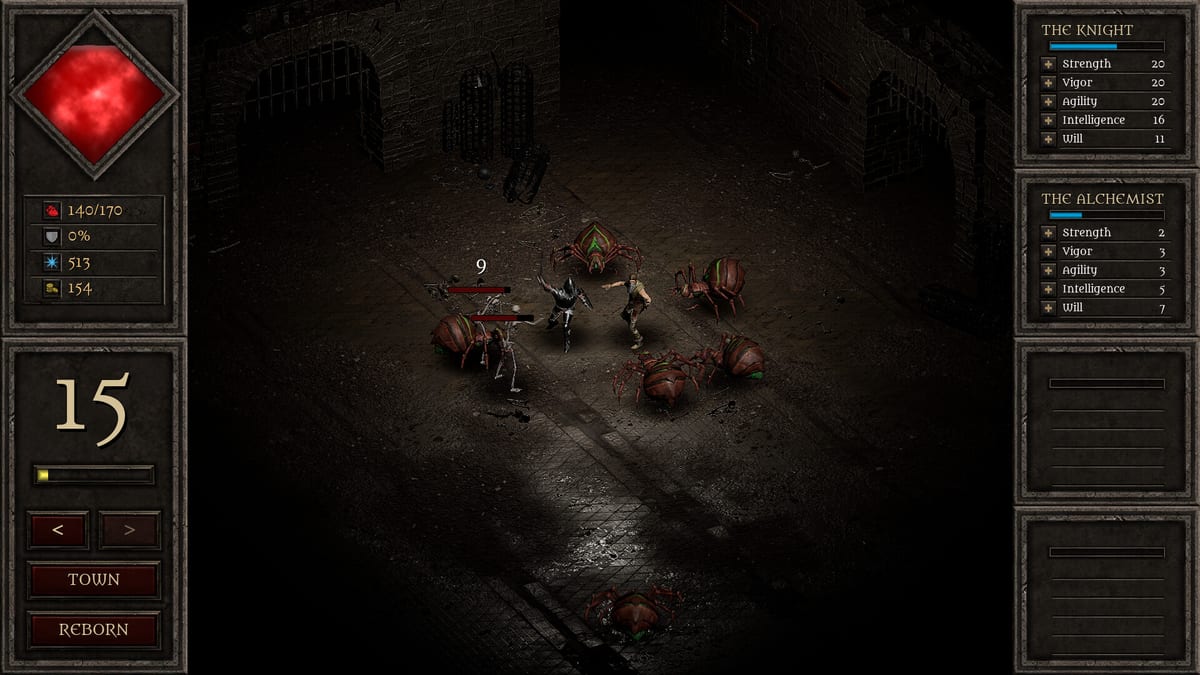
Miseria’s combat is automatic, but your level-up choices are not. Every point you put into Strength, Agility, Vigor, Will, or Intelligence changes how fast rooms clear, how often skills fire, and whether a boss spike ends the descent. This page is the foundation under Early Game Build and Mid Game Build: learn the stats once, then stop guessing.
The five core stats
Strength is your primary muscle for physical hitters. On the starting Knight it usually translates into harder auto-attacks and better returns from weapon upgrades at the blacksmith. If your clear time is stuck because enemies simply refuse to die, Strength is the first knob to turn—especially before Church multipliers arrive.
Agility rewards attack cadence and mobility-style combat feel in an idle framework: more swings, more procs, and better uptime against packs that would otherwise outlast a slow striker. Agility shines when you already survive the floor and need throughput. Dumping Agility while you are dying to contact damage is a common early mistake; stabilize Vigor first, then chase speed.
Vigor is survivability—effective health, toughness, and the buffer that lets thorns and chip damage do their job. Church thorns/spikes upgrades are strong in Miseria precisely because they convert “not dying” into “killing.” Vigor keeps you in that loop. Treat it as mandatory on stretch floors and boss gates, not as a dump stat for later.
Will supports the mental and resource side of the fight: stamina for sustained pressure, resistance to attrition, and synergy with builds that lean on endurance rather than one huge hit. When runs fail because the party fades in long rooms rather than exploding to a single spike, Will deserves a look alongside Vigor.
Intelligence feeds skill-oriented and caster-leaning kits—mana charge, ability potency, and characters like the Alchemist once you unlock them through the Strange Plant path. If your party’s identity is “auto-attacks forever,” Intelligence can wait. If skills are carrying boss phases, Intelligence jumps the queue. Cross-check roles in Party and Characters.
How stats interact with gear and Church
Blacksmith equipment multiplies the stats you already invest in. A strong sword on a Knight with neglected Strength underperforms a modest blade on a correctly stacked fighter. That is why Upgrade Priority matters: buy gear that amplifies your chosen primary, not every slot equally.
Church permanent upgrades change the math after each Reborn. Damage blessings make Strength and Intelligence points go further; defense and thorns make Vigor investments feel “online.” QOL nodes like magnet / auto gold do not raise a number on the character sheet, but they raise effective power by keeping gold flowing into the forge. Rank those nodes with the Church upgrades tier list.
Spending points by stage
Pre-first Reborn: Bias the Knight toward Strength and enough Vigor to stop embarrassing deaths. Touch Agility when packs are thick but not lethal. Leave deep Intelligence until a skill-centric ally joins.
After Alchemist unlock: Split the party’s identity. Keep the Knight’s physical stack; give the Alchemist Intelligence (and enough Vigor to stand in the line). Do not mirror identical spreads on every character—specialization beats clones.
Approaching Floor 19 and beyond: Narrative milestones often sit behind denser enemy checks. Revisit Vigor and Will, lean on thorns from the Church, and only then pour overflow into pure damage. Mid-game advice in Mid Game Build assumes you respect that order.
Practical rules of thumb
- If you die before skills fire, buy Vigor (and Church defense/thorns), not more Strength.
- If you never die but floors take forever, buy Strength/Agility (or Intelligence for casters).
- If gold is the bottleneck, fix economy QOL and blacksmith priority before over-leveling off-stats.
- If a Reborn is close, stop over-investing temporary points that will wipe—bank blessings instead via a planned reset (Reborn planner).
- Re-read this page after each new party slot; the “correct” primary changes when the roster changes.
Common misconceptions
“Balance all five evenly” sounds fair and plays poorly. Idle descents reward a main scaling stat plus a survival floor. “Ignore Vigor because thorns exist” also fails—thorns need you alive. “Intelligence is useless on Knight” is mostly true early, but later party comps may still want mixed auras and skills; judge by what the character actually casts.
For a full beginner loop including when to open the Church, see Getting Started. For ranked character value once you have choices, see the character tier list. Stats are the language of Miseria builds—speak it deliberately and every other guide on this hub gets easier to follow.
Frequently Asked Questions
Quick answers to the most common questions.
What is the best starting stat for the Knight?
Prioritize Strength for clear speed with enough Vigor to survive spikes. Add Agility once you stop dying; delay deep Intelligence until skill kits matter.
Does Reborn wipe my spent stat points?
Yes—character XP and temporary progress reset on Reborn. Permanent Church upgrades remain, so plan temporary stats for the current descent only.
Which stat pairs best with Church thorns?
Vigor. Thorns and spikes convert contact time into damage; Vigor keeps you standing so that conversion happens.
Should every party member stack the same stats?
No. Specialize: physical carries lean Strength/Agility, support and Alchemist-style kits lean Intelligence, and everyone keeps a Vigor floor.
How do blacksmith upgrades interact with stats?
Gear multiplies your invested attributes. Upgrade equipment that matches each character’s primary scaling before buying random off-slot items.
When should I respec my approach mid-run?
When a new party slot unlocks, when Floor 19-style walls appear, or when Church thorns/economy nodes come online and change what bottlenecks you.